Introduction
Newspaper theme is one of the best themes of the current times. It has huge customization opportunities. But, it’s true that high quality themes like this, has greater price and sometimes it exceeds our paying range. Then, everyone tries to find an alternative way to activate the theme within their website.
But, in this Newspaper theme, it has its own customization tools like cloud template, cloud standard pack, cloud reviews, cloud newsletter, mobile theme etc. And among of these plugins, we have to use cloud template in order to customize the website just like you see the prebuilt websites. And when you install and activate this theme, they ask you to install required plugins and use prebuilt website templates.
But, the problem is here, though I activate those prebuilt templates, it always show a blank website. And I also ran into this kind of problems and I also was very depressed, truely. Then I prayed to Allah and I still believe that if I didn’t seek help from him, I couldn’t make my website looks this good.
Start Customization
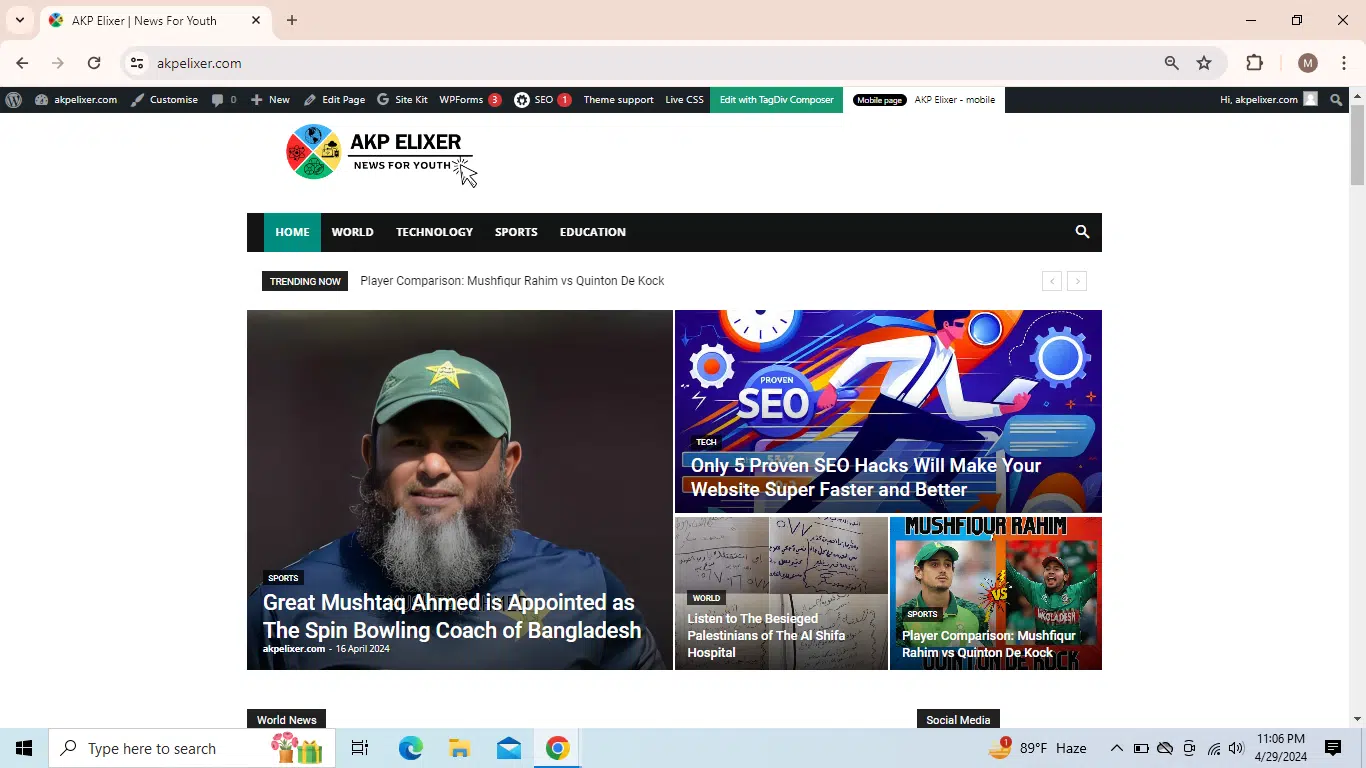
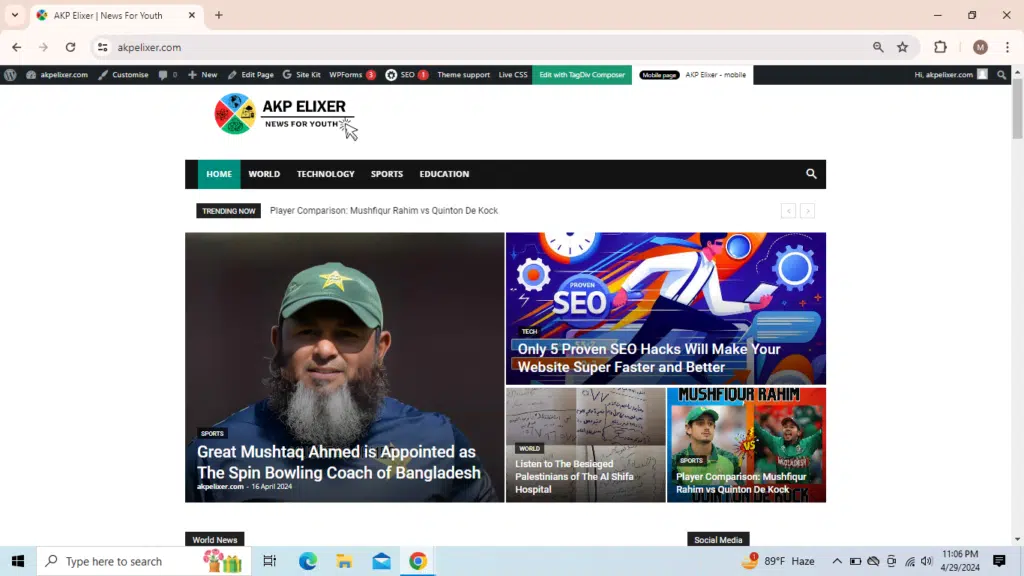
Now, visit my website’s homepage https:akpelixer.com , and relate my website design with the design Newspaper theme shows us. And remember, I didn’t use any templates. Remember, I will customize this theme having 4 categories. So, now it’s time to reveal how I design my website wthout Newspaper Cloud Templates/Library.
STEP 1: Install Theme and Required Plugins and Prebuilt Website
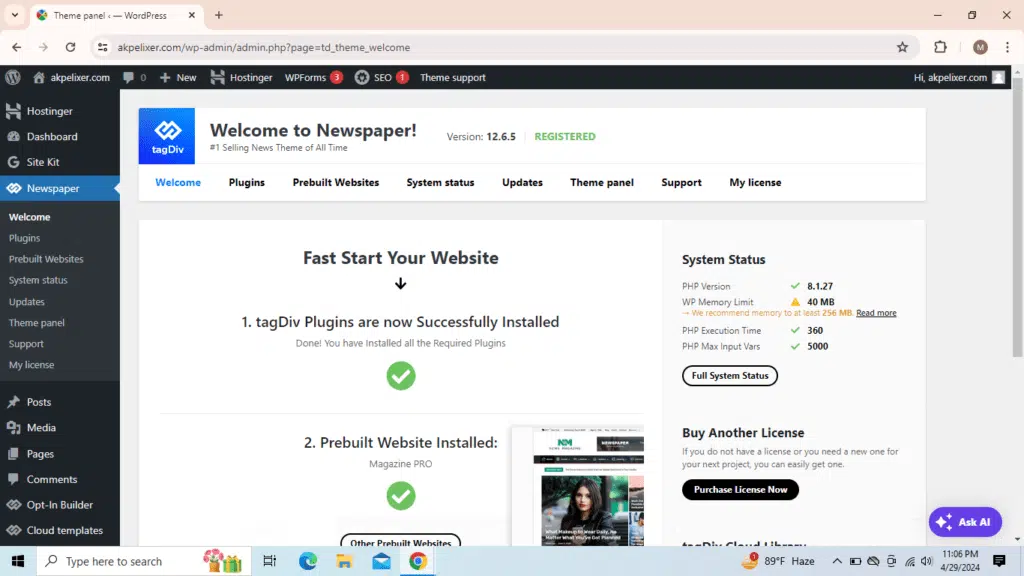
FIsrt of all, you upload your Newspaper zip file and activate it. More specifically,
go to WordPress Dashboard > Appearence > Themes > Add New Theme > Upload Theme > Upload newspaper zip file > Install Now > Activate
Then you will be redirected to Newspaper Theme System and then they will ask you to install and activate required plugins. After that head to the ‘Plugins’ option and install & Activate “tagDiv Social Counter” and “tagDiv Standard Pack” plugins. Then, head to the “Prebuilt Websites” option. and select the “Default Pro”. Though you enable this template, it won’t work on your website because if you use crack version or the version you didn’t purchase, your Tagdiv Cloud Template/Library is empty. You can also check your website now, it’s empty. Let’s move on to the next step.
STEP 2: Do Settings in Theme Panel
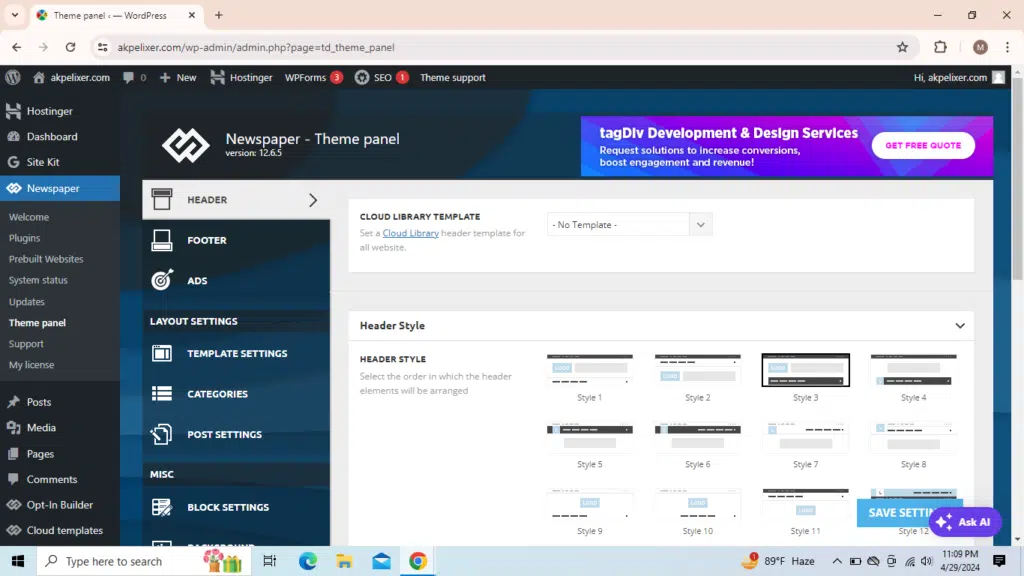
Now head back to your WordPress Dashboard and select “Newspaper” and then select “Theme Panel”. And after that do these settings
Header :
Select “Style 4”
Choose “Main Menu (Default)” in SEARCH POSITION.
Then scroll down and in “Logo & Favicon” option, upload your logo and favicon.
Then scroll down, in “Mobile Header” upload your logo
Enable “SHOW MOBILE MENU” and “SHOW MOBILE SEARCH“
Click on “Save Settings”
- Footer : In “Footer Settings”
- enable “Show Footer”
- Select “Style 9” in “Footer Template”
- In “Sub Footer Settings” enable “Show Sub Footer”
- In “Sub Footer Template” choose “Style 1- Multipurpose”
- Write in this format “Copyright (Site Name) (Current Year)”. In my website, I wrote “Copyright AKP Elixer 2024”
- Click on “Save Settings”
LAYOUT SETTINGS:
In the “Category Global Settings”
Choose “Style 1” in the “Category Template”
Enable “CATEGORY PULL-DOWN FILTER“
Choose “Disable” in the “CATEGORY TOP POSTS STYLE” section
Choose “Grid Style 1(Default) in the “CATEGORY TOP POSTS GRID STYLE” section
Choose “Module 19” in the “ARTICLE DISPLAY VIEW” section
Choose ” Infinite Loading + Load More” in the “PAGINATION STYLE” section
Click on “Save Settings”
BLOCK SETTINGS
Scroll down and click on “Thumbs on Module/Blocks“
Enable all the thumbnail size
Click on “Save Settings”
STEP 3 : Customize Your Website
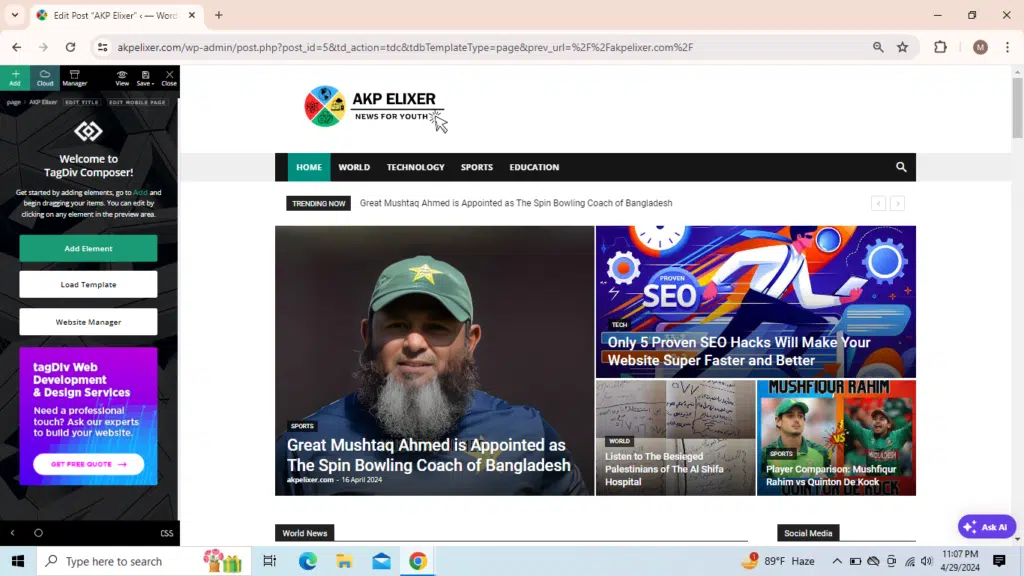
Now, go to your website and select “Edit” on the wordpress navigation bar.
Before starting it, you should know there are two types of header and footer
Template Header/Footer and Global Header/Footer.
The settings you did earlier in the Theme Panel were to customize global templates.
Now click on “Website Manager” and make sure “Global Header” is selected in ‘Header” section and “Global Footer” is selected in “Footer” section.
Now close the pop up window.
Now select “Add Element” and drag “News Ticker” into the site
Then, click “Add” and drag “Big Grid Flex 5” into the site, below “News Ticker”
Now, drag “Row” into the site below Big Grid Flex 5 and just put your mouse on it and you will see “Row Cloumn Element”. From here select “Row” and now in “General” choose “Style 8” in the “Layout”.Now, drag “Flex Block 3” into the left column and drag “Social Counter” into the right column.
Now, drag “Row” into the site below Flex Block 3 and just put your mouse on it and you will see “Row Cloumn Element”. From here select “Row” and now in “General” choose “Style 5” in the “Layout”. Now, drag “Block 1” in the left column and also another “Block 1” in the right column.
Now drag “Flex Block 3” into the site below Block 1 and drag “Block 12” below “Flex Block 3”
STEP 4 : Do Element Settings
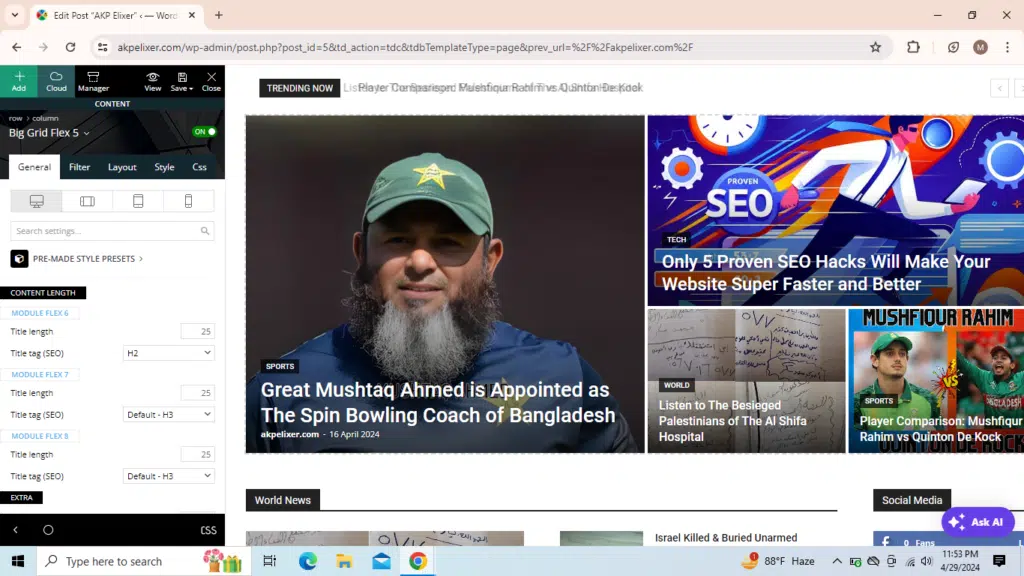
Click on the first “Flex Block 3” and in the “General” section, add custom title and add title url (Category url)
below, in “Extra” set “5” limit posts
In the “Filter” section, set the category you want in the “Category Filter”
Click on the “Social Counter” and in the “General”, add custom title and then below add your social media profile link in each section and set your current follower number in “Fixed Count” and to use Youtube , then follow this https://forum.tagdiv.com/youtube-api-key/
Click on the first “Block 1” and in the “General” section, add custom title and add title url (Category url)
below, in “Extra” set “5” limit posts
In the “Filter” section, set the category you want in the “Category Filter”
Click on the second “Block 1” and in the “General” section, add custom title and add title url (Category url)
below, in “Extra” set “5” limit posts
In the “Filter” section, set the category you want in the “Category Filter”
Click on the second “Flex Block 3” and in the “General” section, add custom title and add title url (Category url)
below, in “Extra” set “5” limit posts
In the “Filter” section, set the category you want in the “Category Filter”
Click on the “Block 12” and in the “General” section, add custom title and add title url (Category url)
below, in “Extra” set “10” limit posts
In the “Filter” section, set ‘”All Categories” in the “Category Filter”
Step 5 : Edit Mobile Page
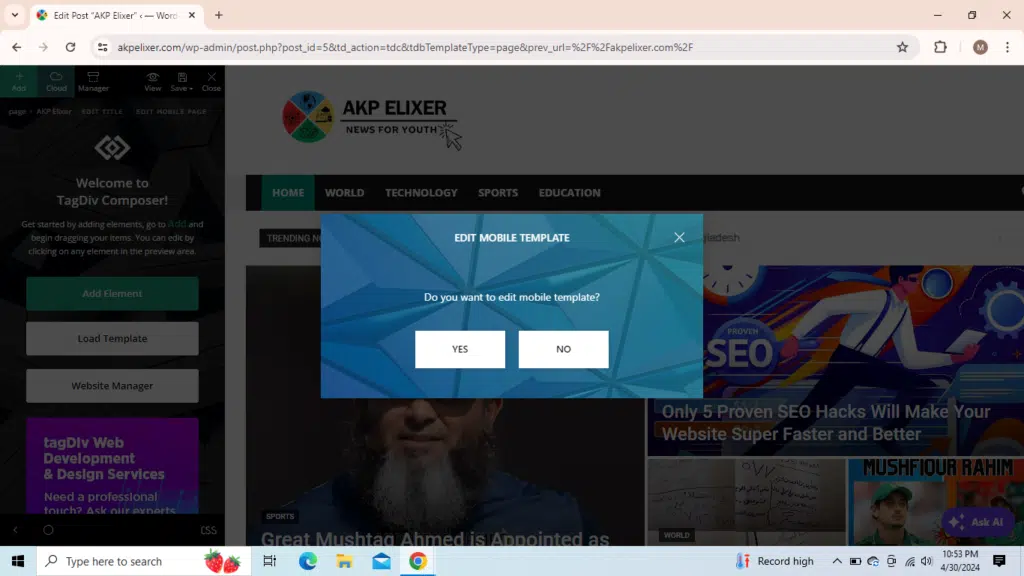
Now, it’s time to edit mobile version . So, first of all the button that is shown in the image above. Then, you will be redirected to another editing page. Then you have to simply drag into site
- News Ticker
- Flex Block 3
- Social Counter
- Title
- Block 12
- Block 12
- Block 12
- Block 12
In ‘Flex Block 3’ , write “Latest News” and choose ‘Default’ in the “Header Template”
Click on the “Social Counter” and in the “General”, add custom title and then below add your social media profile link in each section and set your current follower number in “Fixed Count” and to use Youtube , then follow this https://forum.tagdiv.com/youtube-api-key/
In that ‘Title’ element, write “Categories” in the custom title.
In first ‘Block 12’ , write category name and choose ‘Header 9’ in the “Header Template” abd select category in the ‘Filter’ section
In the second ‘Block 12’ , write category name and choose ‘Header 9’ in the “Header Template” abd select category in the ‘Filter’ section
In the third ‘Block 12’ , write category name and choose ‘Header 9’ in the “Header Template” abd select category in the ‘Filter’ section
In the next ‘Block 12’ , write category name and choose ‘Default’ in the “Header Template” abd select category in the ‘Filter’ section
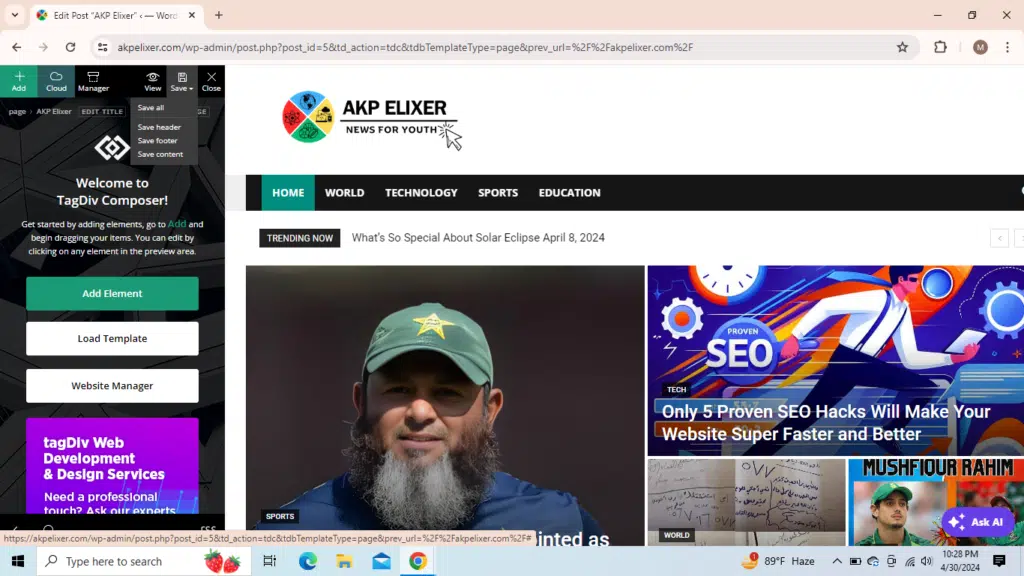
Click save all in the upper
Conclusion
Now, you are all set and just visit your website both in mobile and desktop/laptop. It’s now as beautiful as the newspaper theme template. Thankyou for reading all this. Hope you have got what you wanted. So, leave a comment in the comment section below and follow us
Facebook : https://www.facebook.com/profile.php?id=61558353896266
Twitter : https://twitter.com/AkpElixer
Google News : https://news.google.com/publications/CAAqBwgKMOHhrAww7uG4BA?ceid=US:en&oc=3
Free Palestine ! Free Gaza


